Step 7. Choose posting settings for the Social Rabbit Plugin
Make the following steps to set up Social Rabbit Plugin and automatically promote social media accounts of your store!

How to set up ‘Poster’ on Instagram
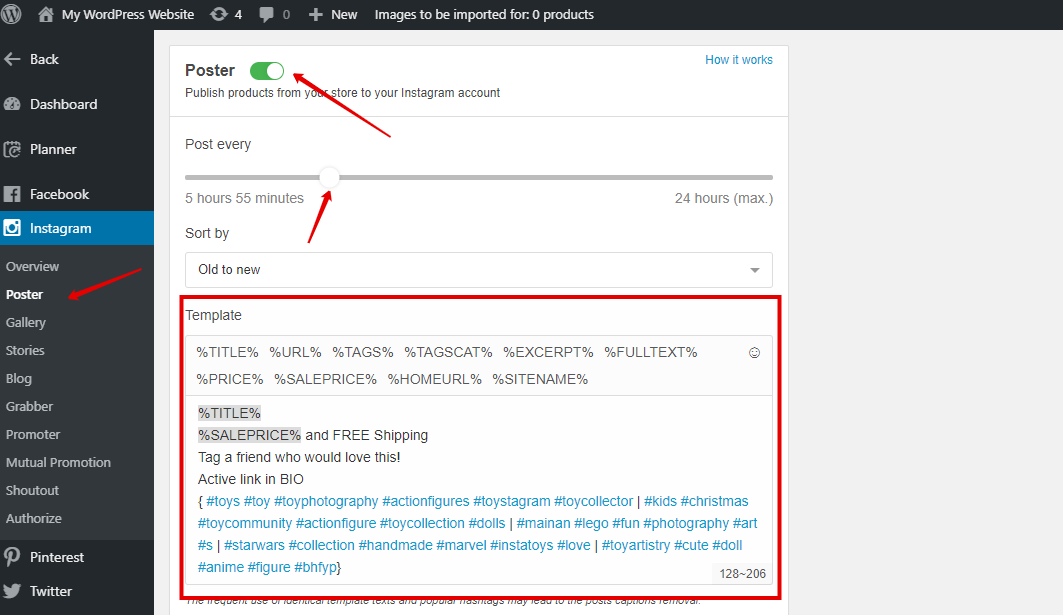
Step 1. Go to “Poster” in the left sidebar.
Step 2. Choose posting time, select a post-sorting type and fill in the “Template” form or use the default one.
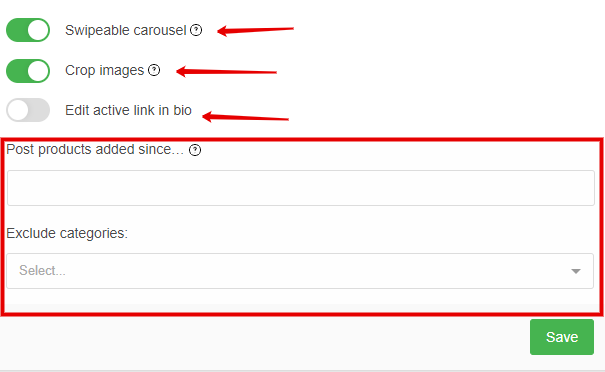
Step 3. Activate the Crop images option to automatically adapt the size of an image to the Instagram requirements.
Step 4. Enable the Swipeable carousel function, so Social Rabbit will post up to 10 photos as one Swipeable carousel.
Step 5. Since Instagram doesn’t allow posting active links, you can set the link here in order to make it visible on your Instagram profile in the bio section. But note, you should fill in the email in the private information section of your Instagram account to use this function.
Step 6. You can also make Social Rabbit post the products that were added to your store since a definite date. You can exclude the definite categories from Poster if choose them in the proper section. Don’t forget to save the settings.
Step 7. If you don’t want Social Rabbit to posts some categories of products, just add them to the Exclude categories field.
Please Note: The features described in Steps 3-7 are not necessary for the correct work of the plugin. You can turn them on if you want.
How to set up “Gallery Poster” on Instagram
Social Rabbit allows editing, posting photos and publishing videos from Media Gallery to your Instagram account.
You should prepare and add necessary materials beforehand by uploading it to the Gallery. There are two ways to do it.
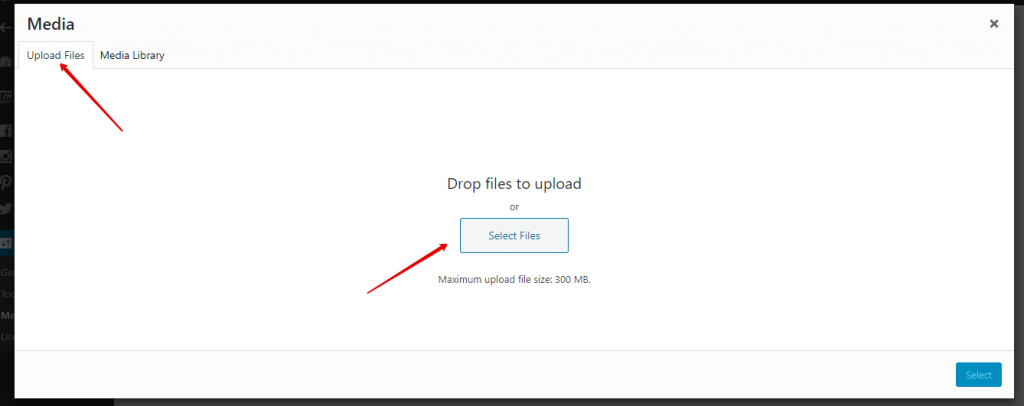
Step 1. Go to Settings -> Media Gallery and click “Add Media”.
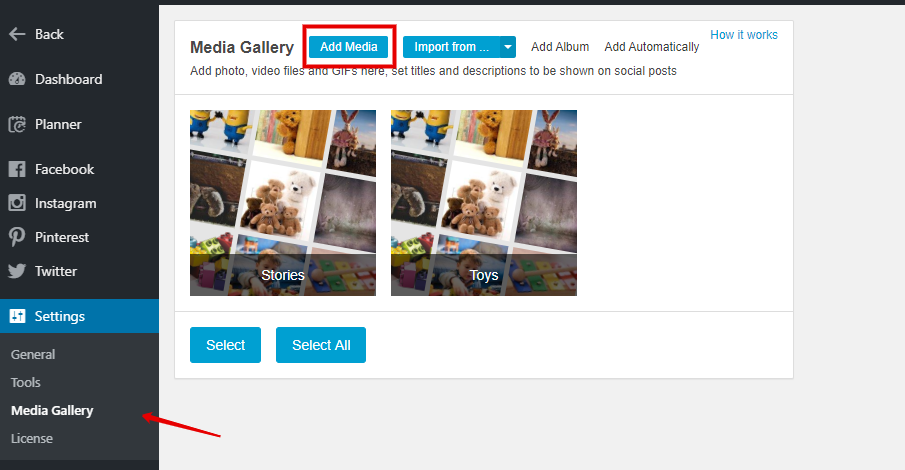
Step 2. Select images you want to upload to your site from your computer
There are two additional ways to add media files to the Social Rabbit’s media gallery. Let’s consider them, too.
The first way is to upload images from free photo bases such as Pixaby and Giphy within the plugin. To do it, follow these steps:
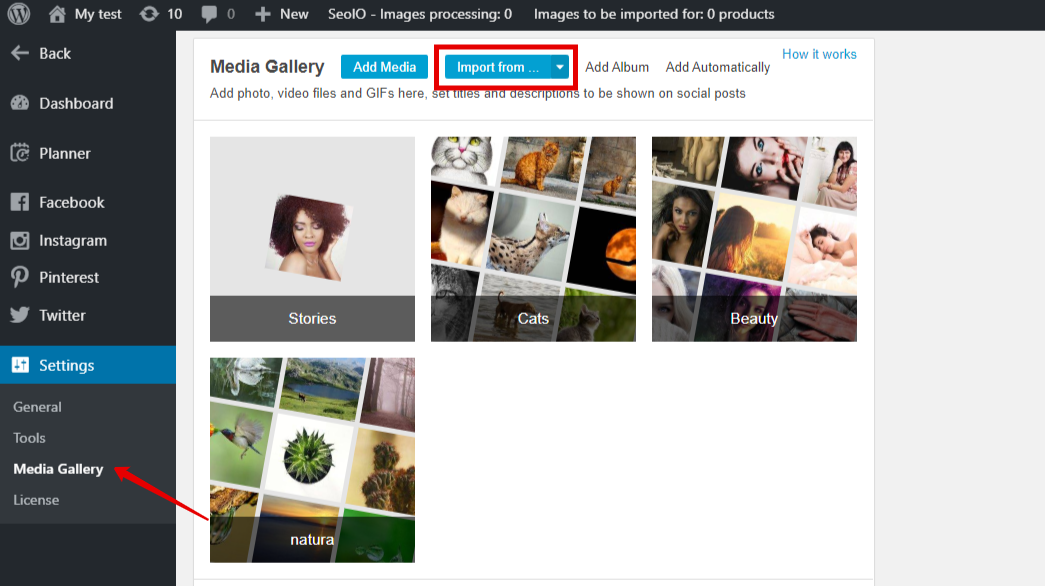
Step 1. Go to the media gallery and click the “Import from…” button.
Step 2. Select the source from which you want to add images. As an example, let’s select Pixaby.
Step 3. Then you just need to find images by relevant keywords.
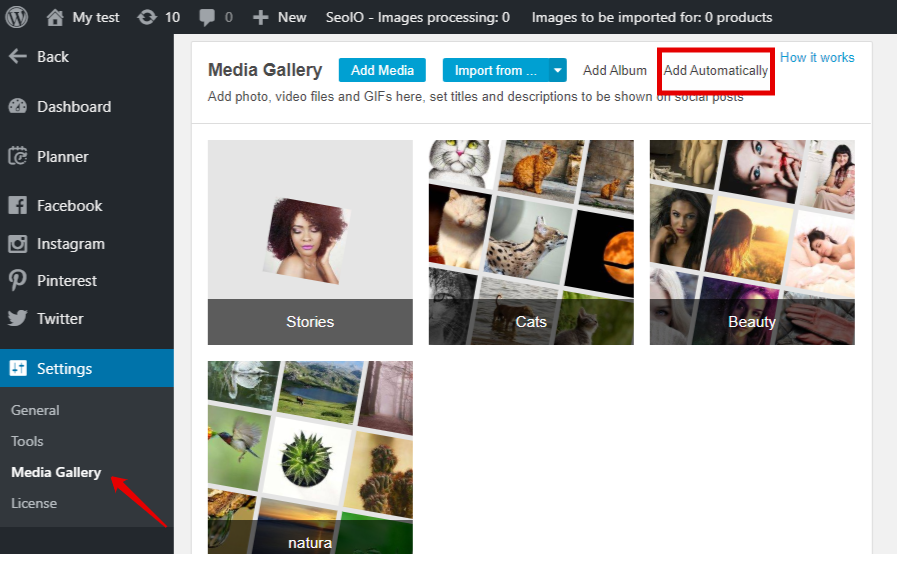
The last way to add various media files to the Social Rabbit’s media gallery is to set up the Automatical Album feature. To do it, follow these steps:
Step 1. Go to the media gallery and find “Automatical album” there.
Step 2. Select the preferable source from which Social Rabbit will upload images. You can select from Pixaby and Giphy.
Step 3. Enter keywords, relevant to your business niche.
That’s all. Social Rabbit will upload images according to your settings.
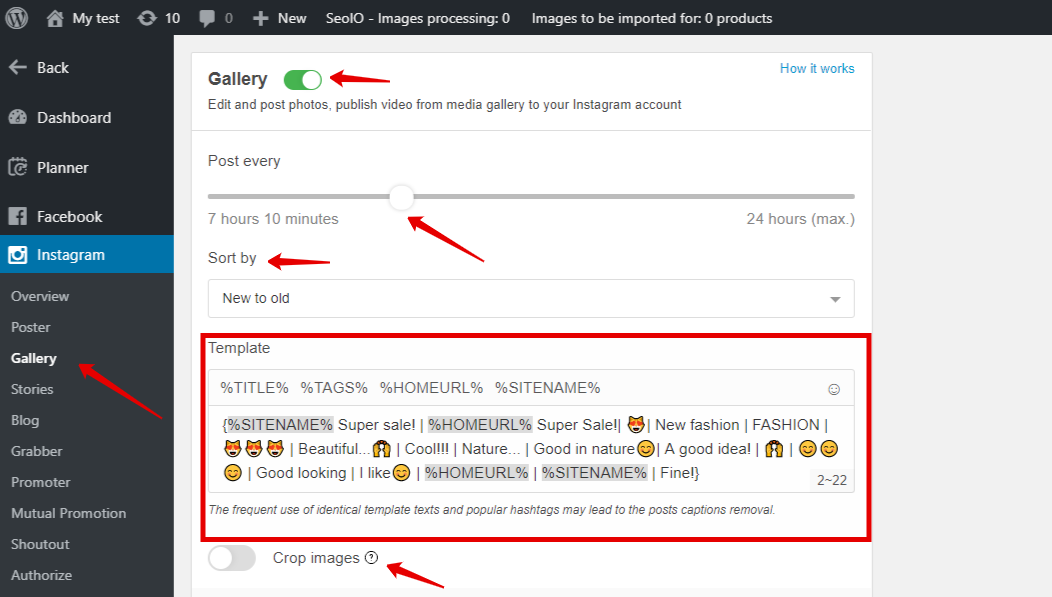
When you upload a number of images to your media gallery, to set up “Gallery Poster” on Instagram, you need to:
Step 1. Go to the Gallery tab.
Step 2. Choose posting time, select a post-sorting type and fill in the “Template” form. You can also click “Crop images” and activate the option to automatically adopt an image’s size to the Instagram requirements.
How to set up “Stories” on Instagram
Social Rabbit allows editing and posting photos and publishing videos from media gallery to your Instagram Stories.
Please Note: All the necessary media files should be uploaded to the “Stories” album beforehand in the media gallery. You can use the same ways which we described in the previous section about Gallery Poster.
To set up “Stories” Instagram, follow these steps:
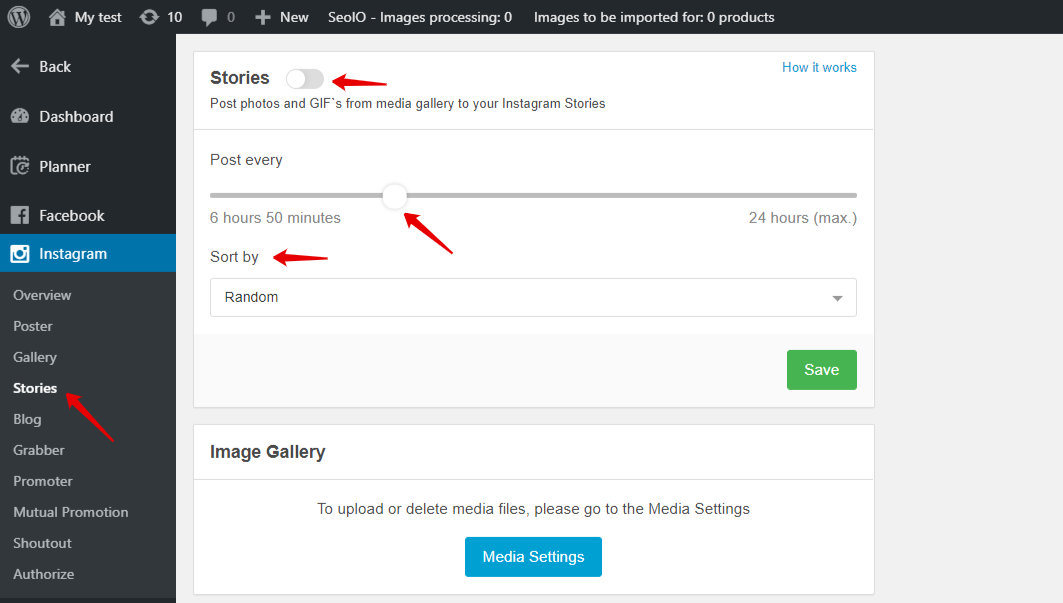
Step 1. Go to the Stories tab in the Instagram section within Social Rabbit.
Step 2. Choose posting time, select a post-sorting type, and click “Save”.
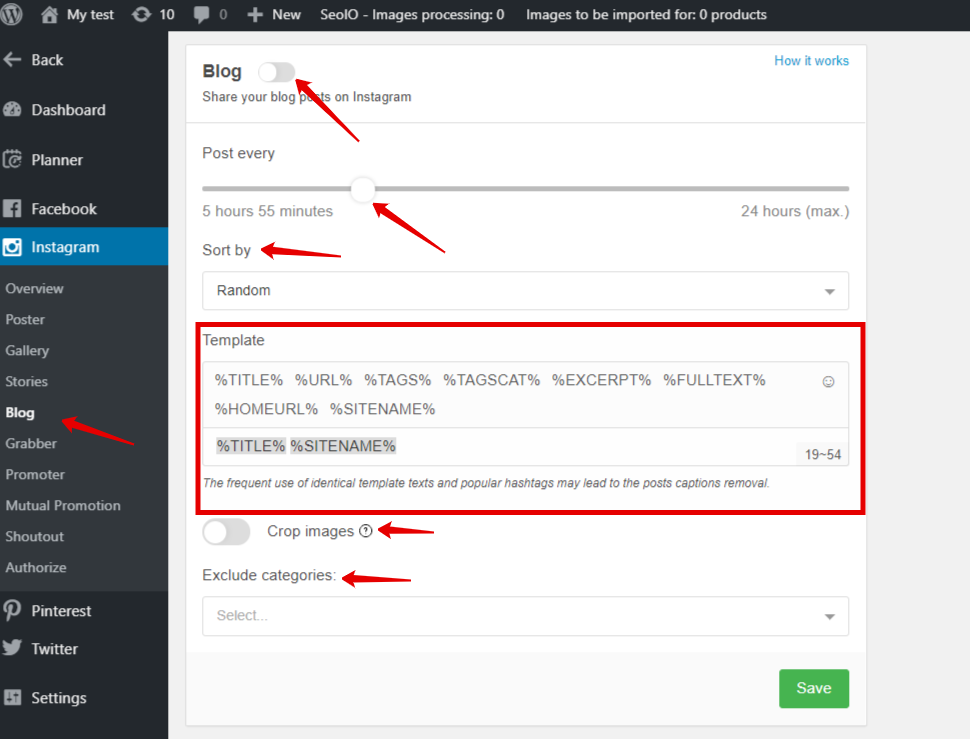
How to set up “Blog Poster” on Instagram.
This function allows sharing blog posts from your website on Instagram.
Please Note: To use this option, you need to have at least 15 articles in your Blog on your site/store.
To set up Blog Poster, follow these steps:
Step 1. Go to the Blog tab in this Instagram section within the plugin.
Step 2. Choose posting time, select a post-sorting type and fill in the “Template” form.
Step 3. You can also click “Crop images” and activate the option to automatically adopt an image’s size to the Instagram requirements.
Step 4. If you don’t want Social Rabbit to posts some categories of articles from your Blog, just add them to the Exclude categories field.
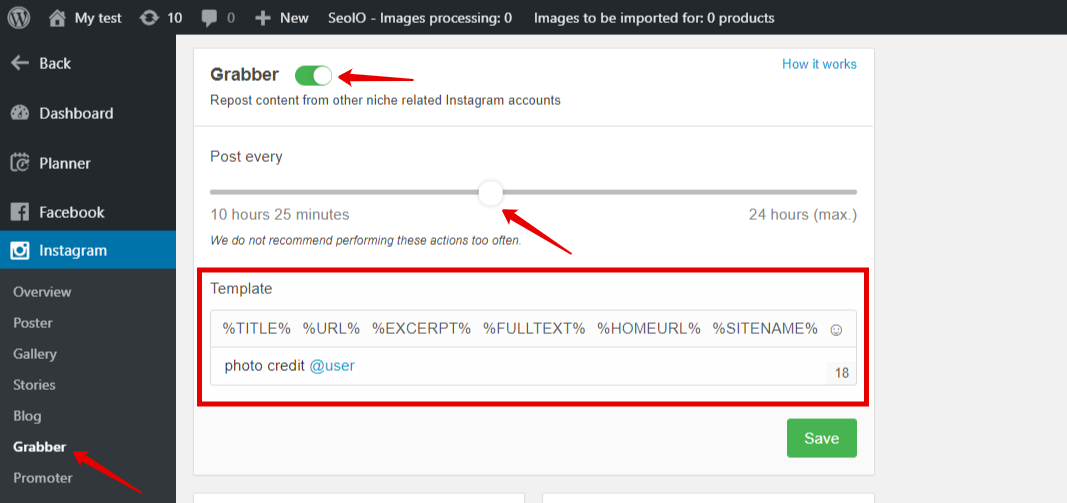
How to set up “Grabber” on Instagram
Instagram Grabber goes through all Instagram pages, selected by relevant keywords, finds the most popular publications and re-posts them to your account to make it more interesting.
To set up Grabber, follow these steps:
Step 1.Go to the“Grabber” tab in the Instagram section withing the plugin.
Step 2. Choose posting time and fill in the “Template” form. We do not recommend reposting too often, especially, if you have a new Instagram account. It can be suspended. So, it’s better to let it post once every 4-5 hours for the first month. Save your settings.
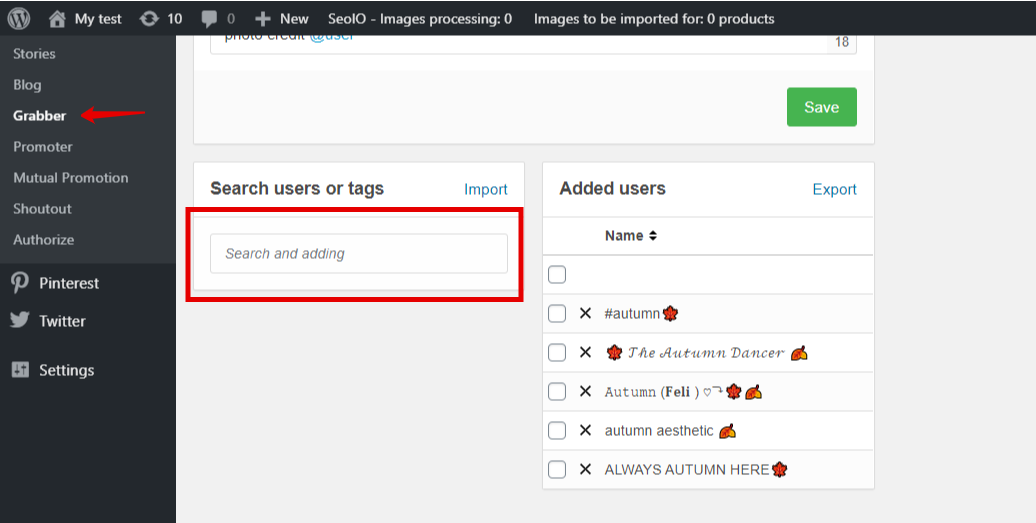
Step 3. Select Instagram users or tags, using keywords relevant to your niche. Grabber will take the most popular posts from the chosen accounts and share them on your account.
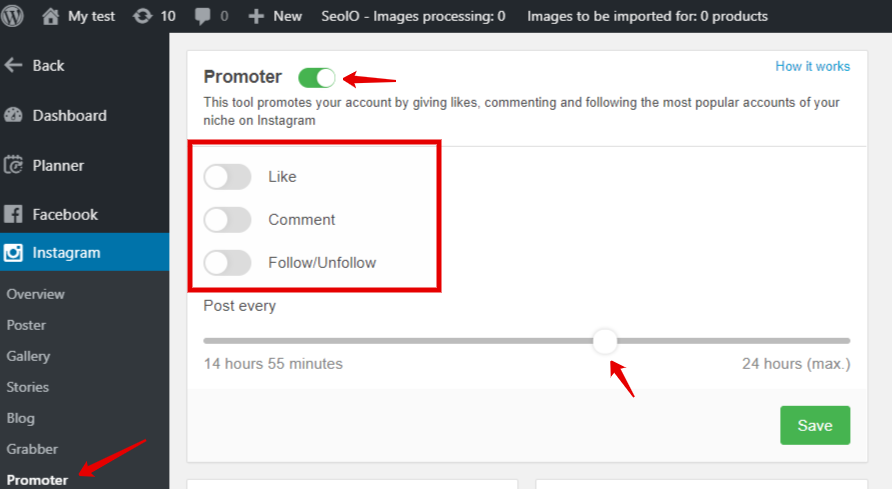
How to set up “Promoter” on Instagram
This tool goes through the chosen Instagram pages and draws attention to your account by following, liking and commenting on their posts and accounts.
To set up Promoter, follow these steps:
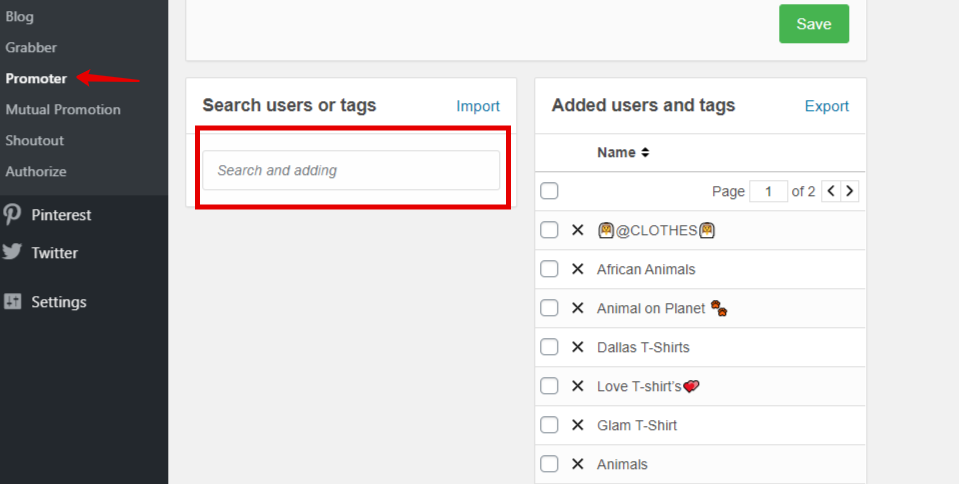
Step 1. Go to the Promoter tab in the Instagram section within the plugin.
Step 2. Choose posting time, switch on the functions you need and save it. We do not recommend to post too often, especially, if you have a new Instagram account. Probably, it will be blocked. So, it’s better to let it post once every 4-5 hours for the first month.
Step 3. Select Instagram accounts or tags, using keywords relevant to your niche. This tool will promote your account by giving likes, commenting and following the chosen users. Select all or several pages and click ”Add”. You will see them in “Added users”.
How to set up “Mutual Promotion” on Instagram
This tool brings you many likes, comments, and followers within a short period of time, exploiting Social Rabbit plugins installed on other websites. Social Rabbits give likes, comment and follow each other automatically. The big number of likes and followers makes your account more trustworthy.
To set up Mutual Promotion, follow these steps:
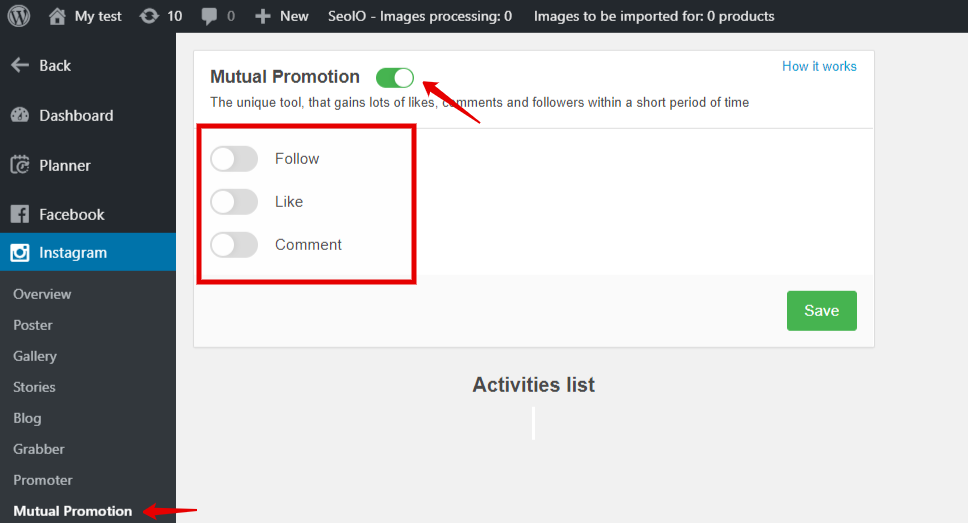
Step 1. Go to the “Mutual Promotion” tab in the Instagram section within the plugin.
Step 2. Switch on the necessary options and save changes.
How to set up “Shoutout” on Instagram
This tool will help you to find Instagram influencers, interested in shoutouts and ads. Just create an offer and send bulk messages to all the users in the list.
To set up Shoutout, follow these steps:
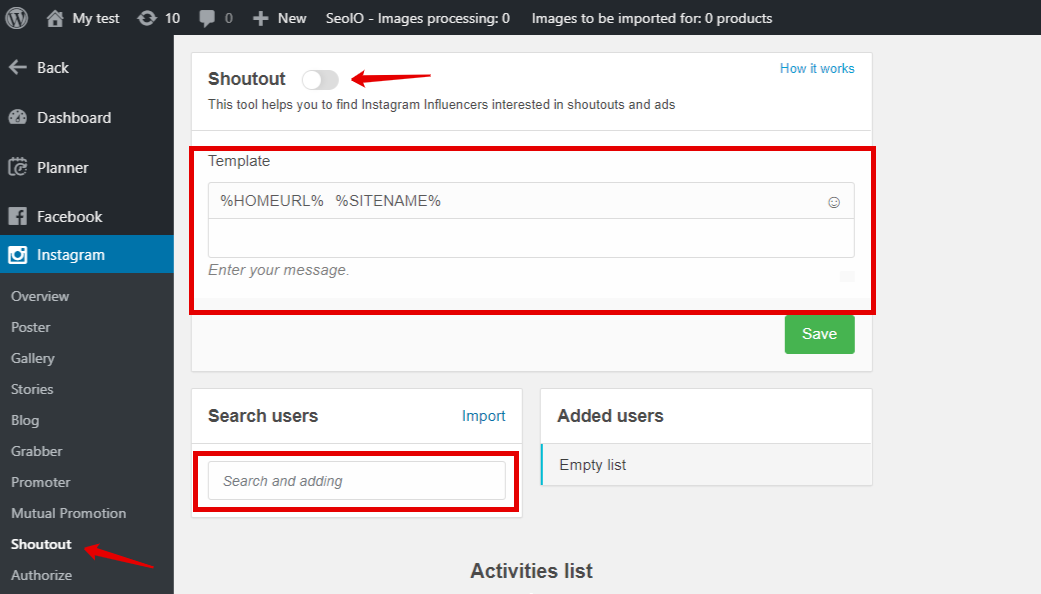
Step 1. Go to the Shoutout tab in the Instagram section withing the plugin.
Step 2. Enter cooperation or ads offer and save it.
Step 3. Select Instagram accounts, using keywords relevant to your niche. Select all or several pages and click ”Add”. You will see them in “Added users”.
Also, Social Rabbit can promote your store on Facebook, Twitter, and Pinterest.
The setup process for other three social networks is the same. But if you want to get more details about the setting and learn about additional tools Social Rabbit has – please visit Social Rabbit’s Knowledge Base.
As you see, the Social Rabbit Plugin really has lots of cool features you could make use of!