Step 5.2. Create and set up your store accounts in social networks: Instagram Business Account
Instagram is a perfect place to promote your dropshipping store. It focuses on visual content, so you can safely boast of your product variety here. To create and edit an Instagram account is the first step of your store promotion. This article will tell you how to create and edit your store’s Instagram account and switch to Business one. Let’s start!

You can create an Instagram account in the Instagram app on your phone or in its desktop version.
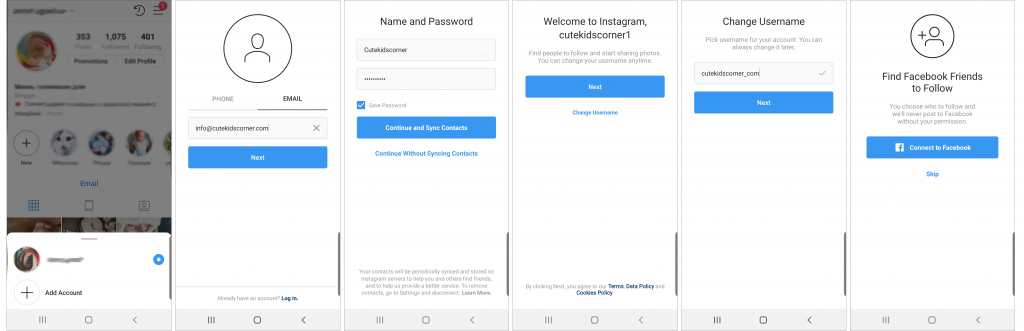
Sign in using your phone number or email. Then enter a full name. As it’s your store’s account, so enter the complete name of your store here.
Username is a nickname that will be displayed in your profile, comments, and ads. So, make it up – but if it’s already in use, try adding underscore – ‘_’ mark – or other available symbols to make it different.
What mobile registration looks like:
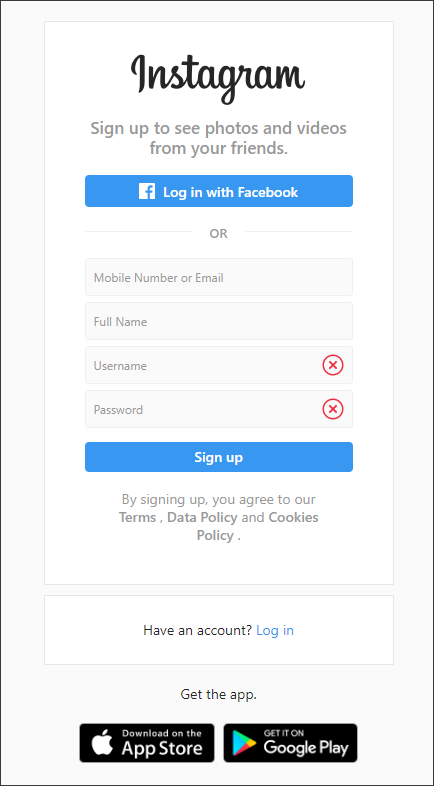
Desktop registration:
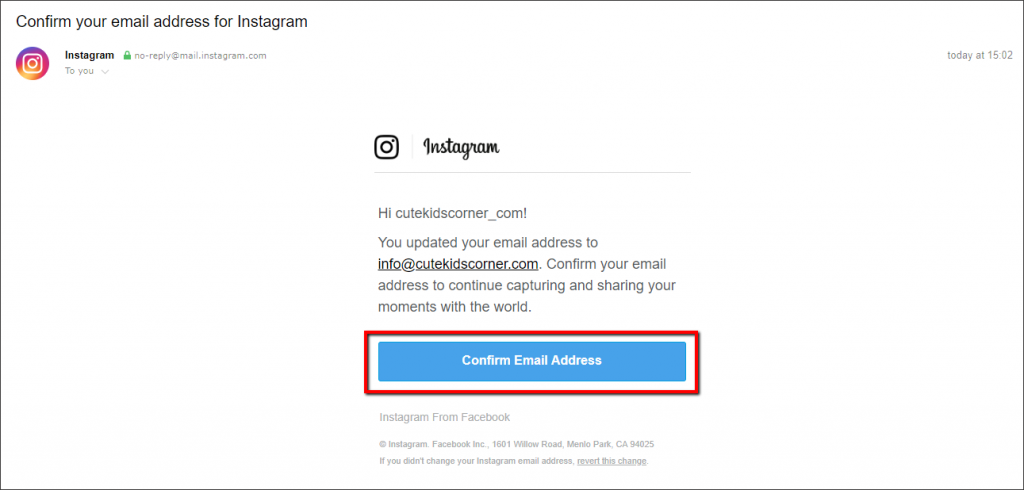
Having completed registration, you need to upload your profile photo and then confirm your email address. Click ‘Send Confirmation’ to receive a confirmation email from Instagram.

Check the email you used to sign up and click ‘Confirm Email Address’.
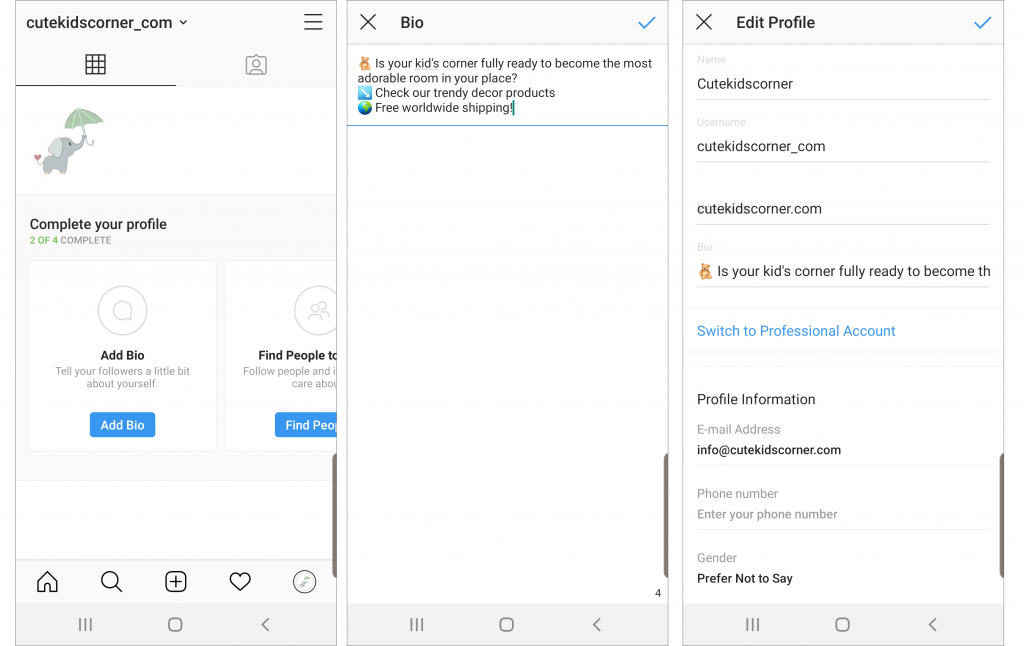
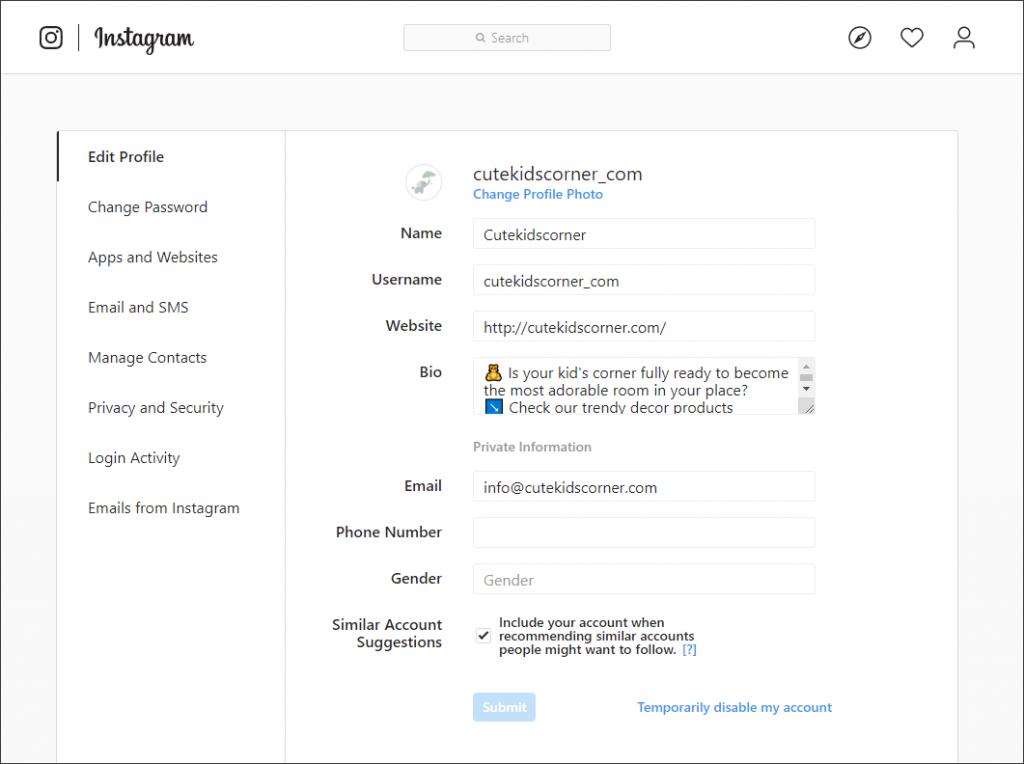
Hooray! You’ve created your store’s Instagram account. Let’s edit it and add more info – you can do it from either your phone or your computer. Press the ‘Edit Profile’ button or scroll down to the suggestions. Enter your BIO describing your store assortment, put your store URL and email. Then you’ll need to click ‘Switch to Professional Account’.
Mobile app:
Desktop:
You can connect your account with Social Rabbit Plugin and set automated content posting and users following. We also can help you with creating professional content for your social media accounts, check this service if you’re interested.
Let’s move on to Business account creation now.
What is a Business account and what benefits does it have?
A business account is the profile of your dropshipping store on Instagram.
Why do we need a business account if we already have a usual one?
Well, a Business account gives you access to powerful functions that will let you:
- Increase your followers’ engagement
- Enlarge traffic to your dropshipping store
- Boost your sales
- Understand what types of posts are the most effective
- Gather the data about the most preferable posting time and format
- Get more and more followers
Those powerful functions are:
- Profile buttons
You can place buttons in your profile – for example, a ‘Call’ button that will let visitors contact you at once to ask their questions.
- Account insights
Statistics will show you what posts have the biggest engagement, who are your followers (their gender, age, location), how many people viewed your profile or clicked on your link, etc.
- Post promotion and ads creation
A business account suggests the promotion of your posts according to chosen targeting parameters: age, gender, location, interests of the audience.
This function alone is worth switching to a Business account – it’s really a cool one.
- Your company physical address
To form trust-based relationships with your customers, you can place your company’s physical address in your profile.
- Profile category choice
Choose the most suitable category of your store so users can easily understand what’s your profile is about.
Step 1. Create a Facebook Business account (page).
Business Page is a page of your dropshipping store on Facebook (not to be confused with your personal account), and you won’t be able to switch to Instagram Business account without it.
You can create and adjust such a page in mere minutes (if you don’t edit it). Go to Facebook, click on the arrow button and choose ‘Create page’. Further steps of Business Page creating and editing you can check in the previous step.
After you’ve created a new FB page, you automatically become its administrator. If somebody created this page for you, ask this person to assign you the administrator role.
Click ‘Edit Profile’ and select ‘Connect an Existing Page’. Then you should open your Facebook account on the desktop.

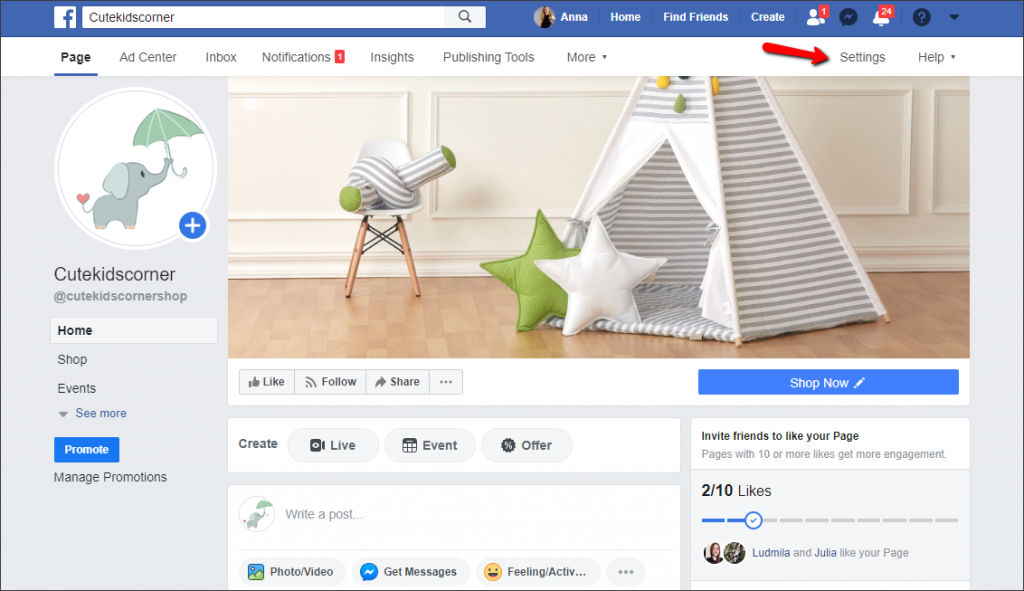
Open your store’s Facebook Page and go to Settings.
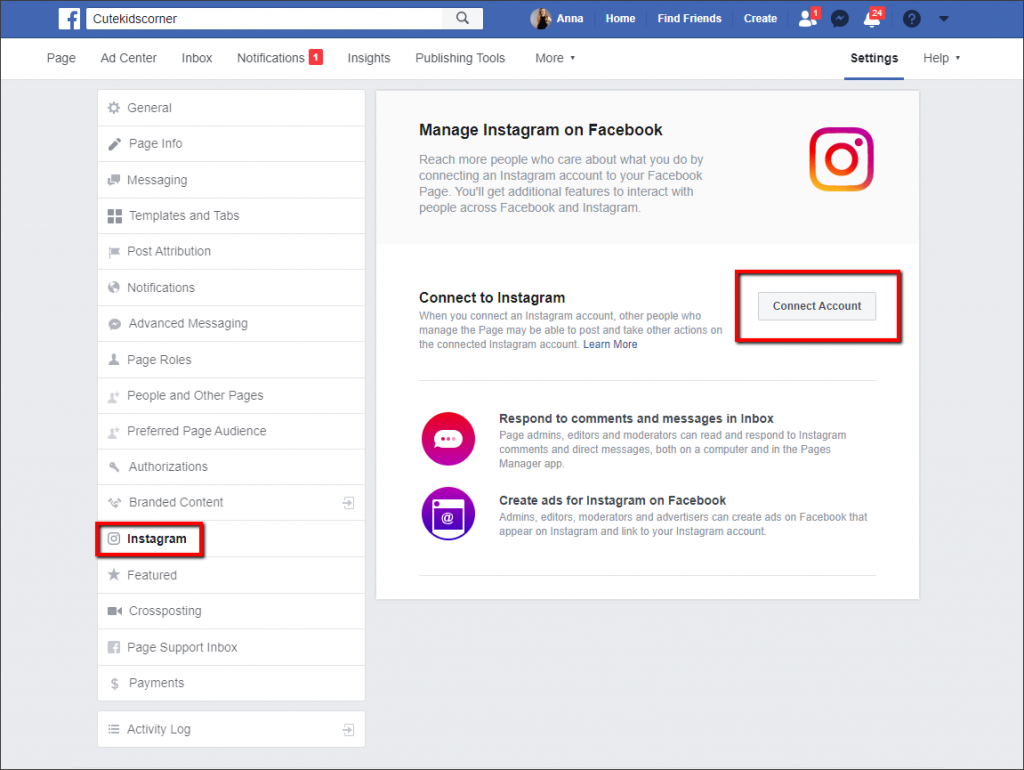
Choose ‘Instagram’ from the left menu and select ‘Connect Account’.
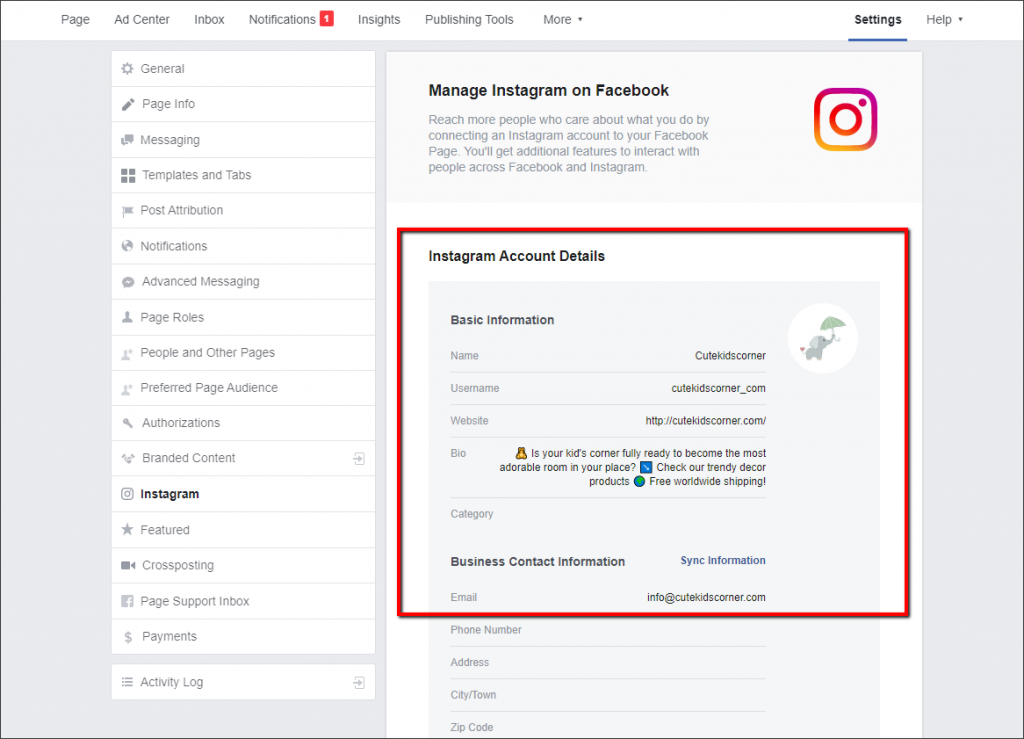
After you put your Instagram account login and password Facebook will connect your Instagram account and sync the information. Now you can edit your Instagram BIO or Business Contact Information using Instagram or Facebook.
Easy-peezy!
Step 2. Switch your store Instagram account to a Business one.
In the Instagram app, go to the menu and choose ‘Switch to Professional Account’.
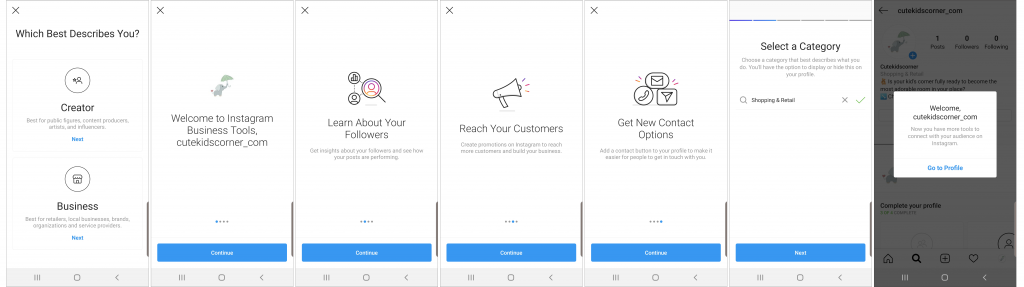
Then you should select ‘Business’. Press ‘Continue’ after you read all the information about new functions you get and then select the ‘Shopping & Retail’ category. Click ‘Next’ and ‘Go to Profile’.
Well done! You’ve just created Instagram Business Account!
Step 3. Edit your new-made Instagram Business Account
Check if you filled in your store’s email, phone number and address fields. This info will be available for your Business Account visitors.
Is it allowed to leave these fields empty?
It depends on your Business Account purpose, the way you sell products to customers and communicate with them.
For instance, if you have an online store and sell only online, fill in your email and phone number (or at least one of them – as a method of communication). Add your store address for trustability if you like.
Now let’s see how to make use of possibilities that this account gives.
Profile insights
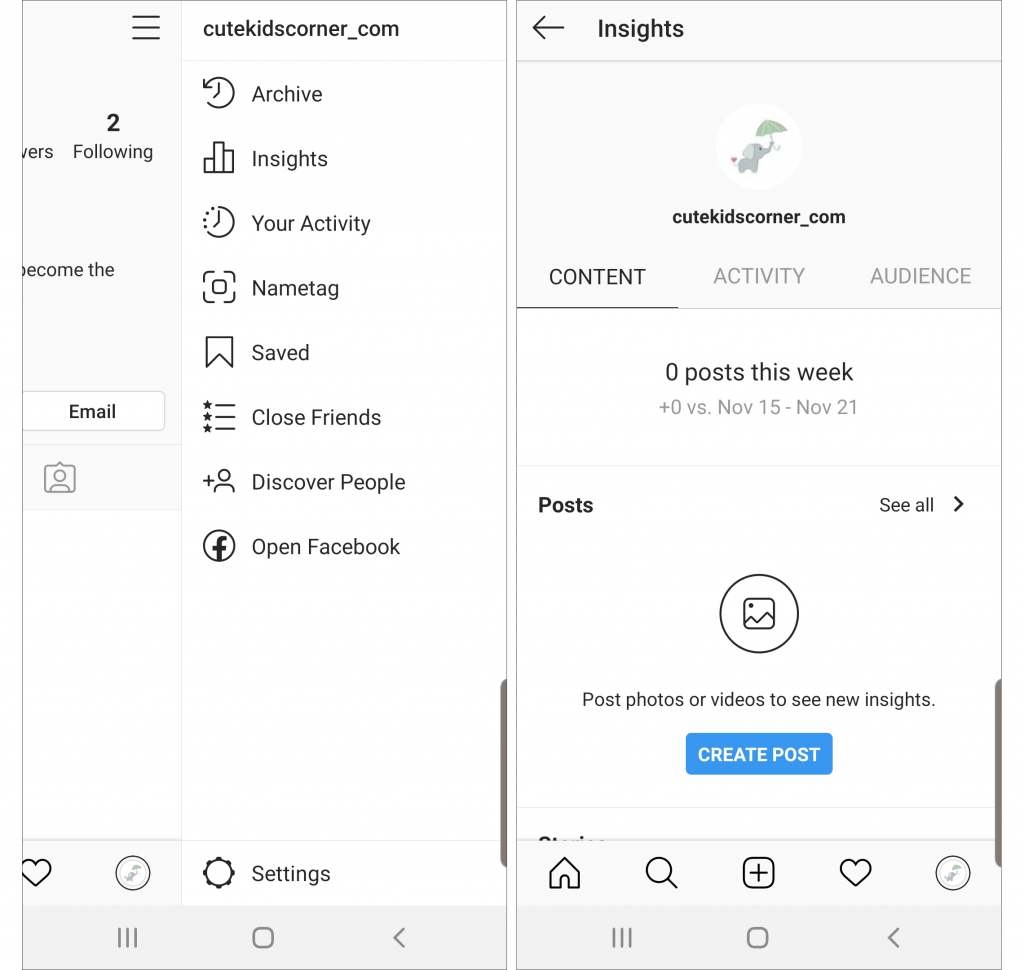
These statistics provide comprehensive data on your account performance. To take a look at it, press a little chart button on the right corner and select ‘Insights’.
The insights include:
- General info about your account
- Data on followers
- Posts/Stories statistics
- Your promotions (ads)
NB: Insights provide data only on those posts that you published after switching to a Business account.
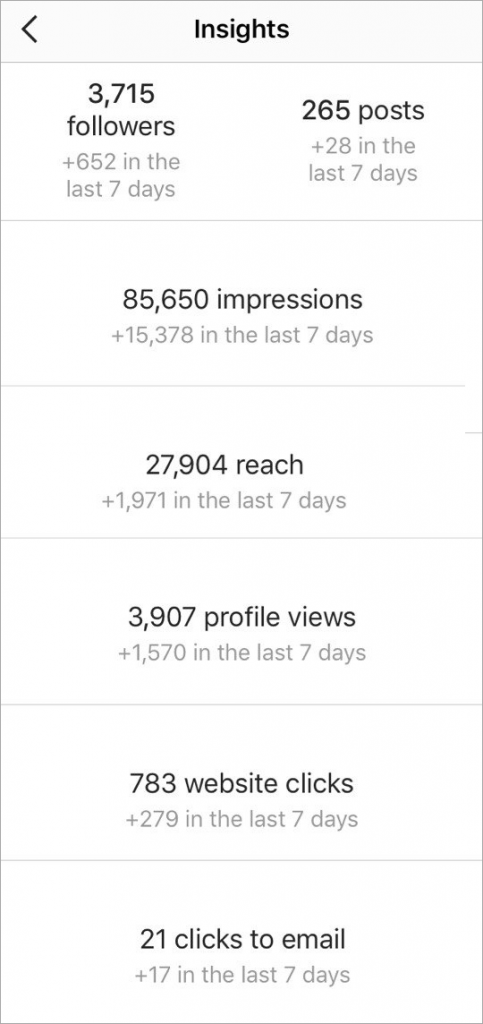
Insights include your profile statistics for the week – impressions, reach, profile view, website clicks, click to email.
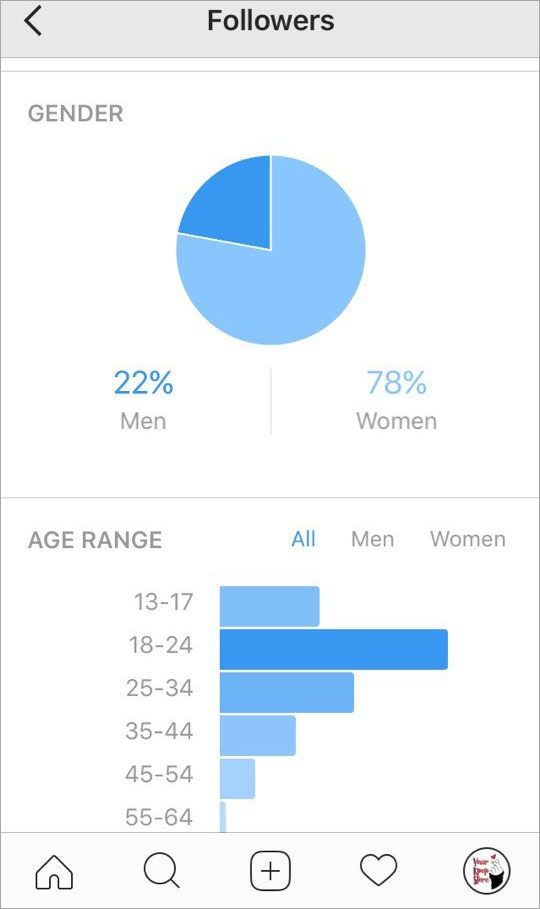
The audience section displays extensive data about your followers.
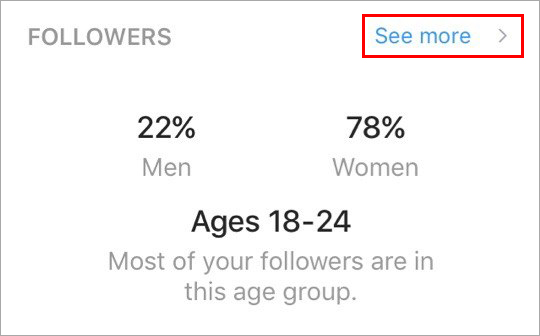
- Demographics – gender and age. Here you’ll see who visits your page – this info will definitely help you understand for whom you make posts and how to find a special approach to your audience.
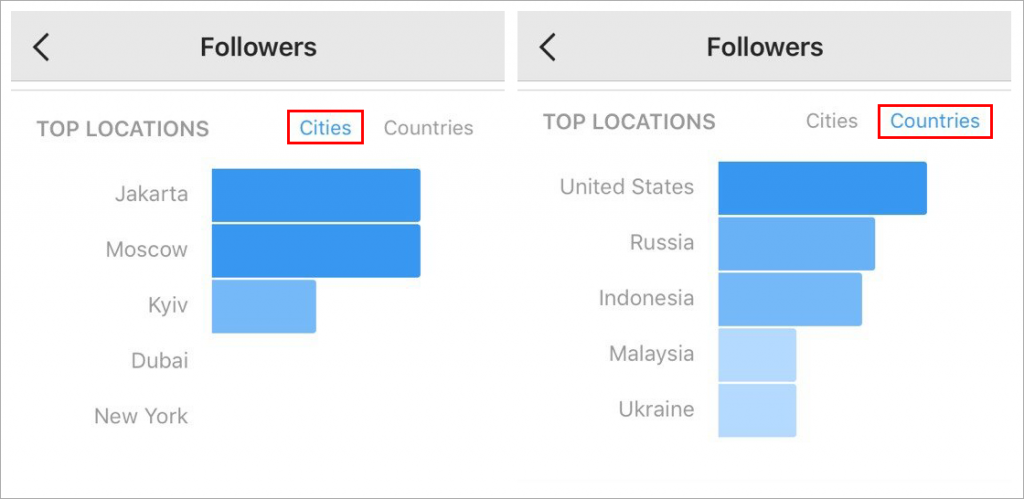
- Top locations (geodata) – cities and countries residents of which visit your account
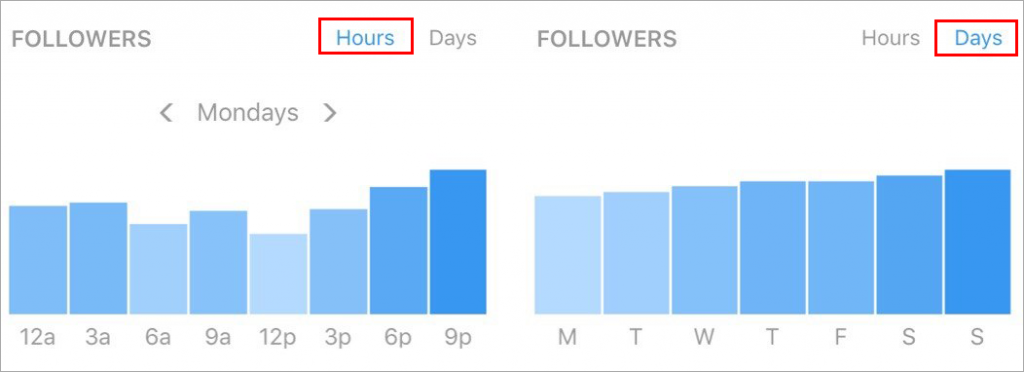
- Traffic data – hours and days when your account is the most crowded.
The content section shows insights for each post separately or even sort them by chosen characteristics.
But first things first!
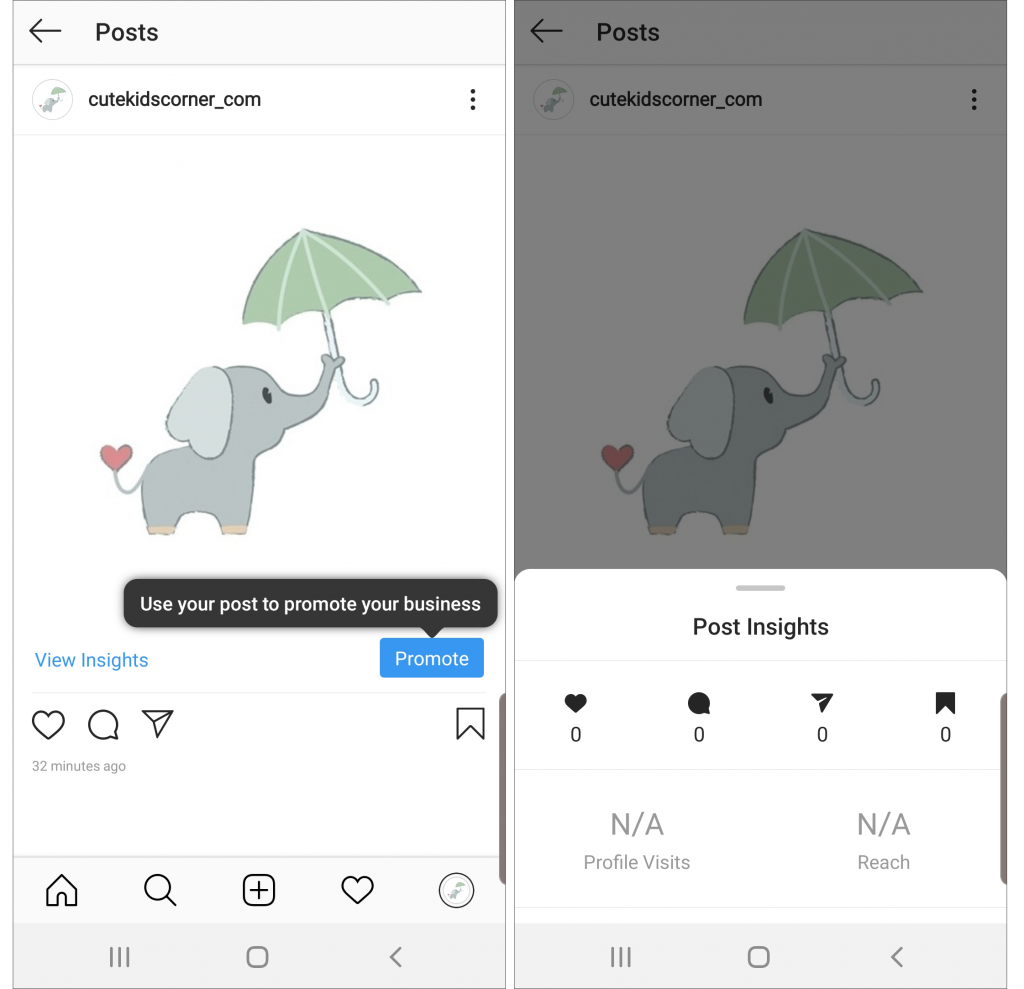
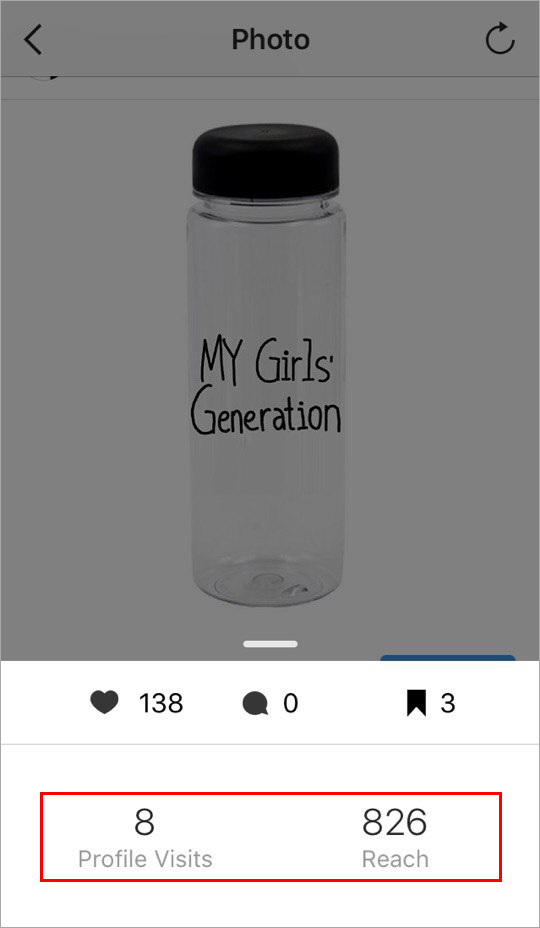
- Post insights tell you how many people were reached, number of likes, comments, and savings. To view this info, press ‘View Insights’.
Press on the opened insights and you’ll be able to dive in more detailed analytics of your account and understand which posts are the most effective. Compare such effective posts and detect common features.
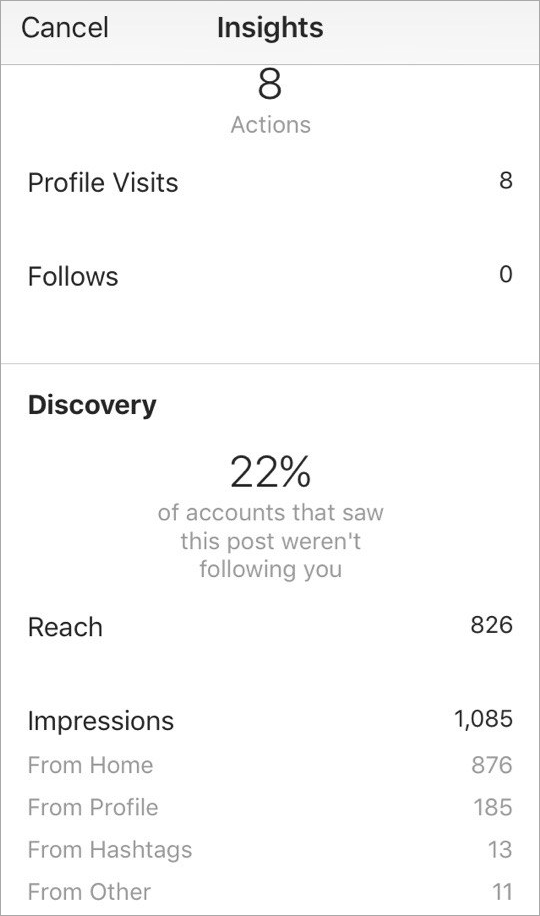
What posts to analyze: all posts, photos, videos, slides. Having studied them, you’ll see the number of impressions, reach, new followers, visitors from hashtags/profiles, etc.
Such an analysis will help you keep creating cool posts in the future, increase engagement rate (ER) – and boost sales, of course!
Now you have a step-by-step instruction and necessary knowledge on how to create an Instagram Business profile. So, what are you waiting for? Create a store Instagram profile for your store right away! With its help, you’ll start attracting more and more customers and getting a real profit!
P.S. If you’re interested in our experience in Instagram ads, check this article. And if you’re interested in getting ready ads for your store, check this service.